|
If you live in an urban area and are interested in raising your own meat or animal products. there are more options than what you might think. Before investing in the animals, housing and other supplies, be sure to check with your city ordinances! Doing so could save you a lot of trouble and money down the road. If you are wanting to be a breeder, you will also need to check regulations before raising and selling. The intent here is to provide information on small animals suitable for raising in backyards. Our focus will be on meat and other animal products. WARNING: Keep your distance and don't become too attached!
Ducks & Geese One's first thought would be to raise ducks and geese for their meat. Another product would be their eggs. Duck and goose eggs are great for eating. Some people prefer to use duck eggs over chicken eggs for baking. Another use of the eggs would be to blow out the insides and decorate the shells.
Now for a couple animals I have never been around or raised... Quail and cattle. I will share what I do know.
Minature Cattle
Exercise caution before breeding! Due to their small size I would be concerned about breeding and the ability to give birth naturally. To avoid the stress and expenses associated with problem deliveries, do you research first. I hope the information above has been helpful and inspired you to raise a few backyard animals. But watch out, before you know it you will be moving to the country in search of larger pasture!
0 Comments
Yes, pun intended. 1. Size Matters - The thicker stalks are good for roasting and grilling. The thin stalks can be eaten raw, blanched or in a stir-fry 2. Did you know asparagus is in the lily family? That's why it's best to store it standing in a jar of water in the refrigerator. 3. Cut off the woody bottom part of the stalks and toss in the compost pile. Chop, eat raw or cook the upper part of the stalk. 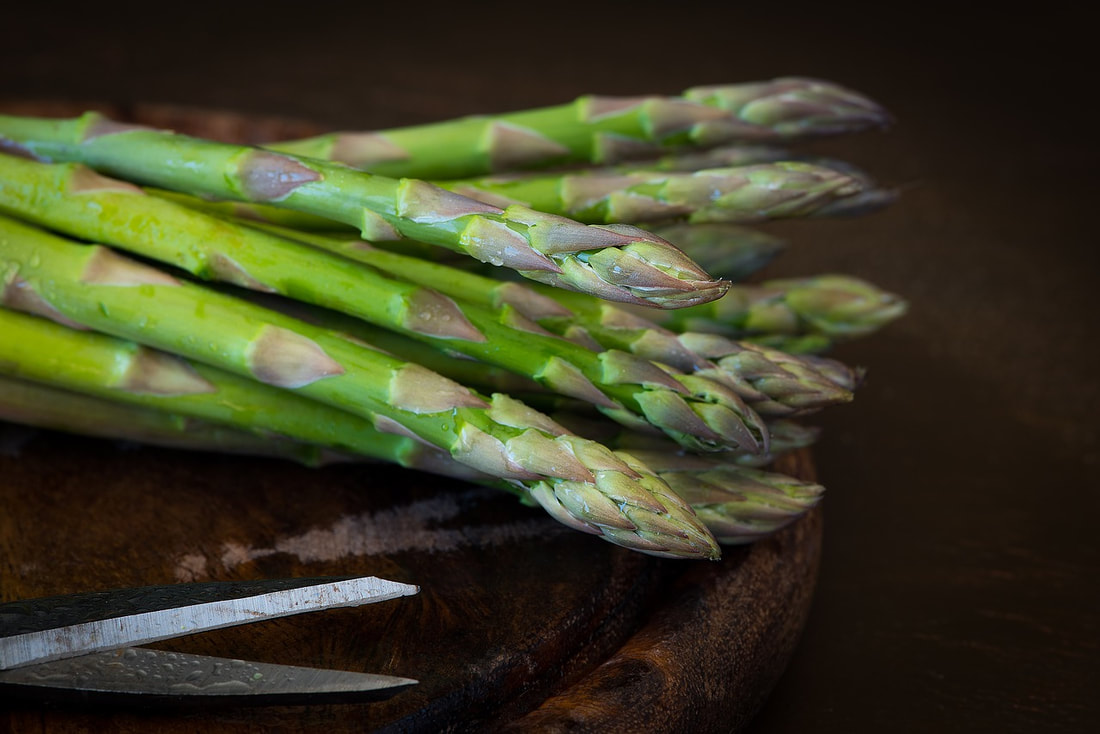 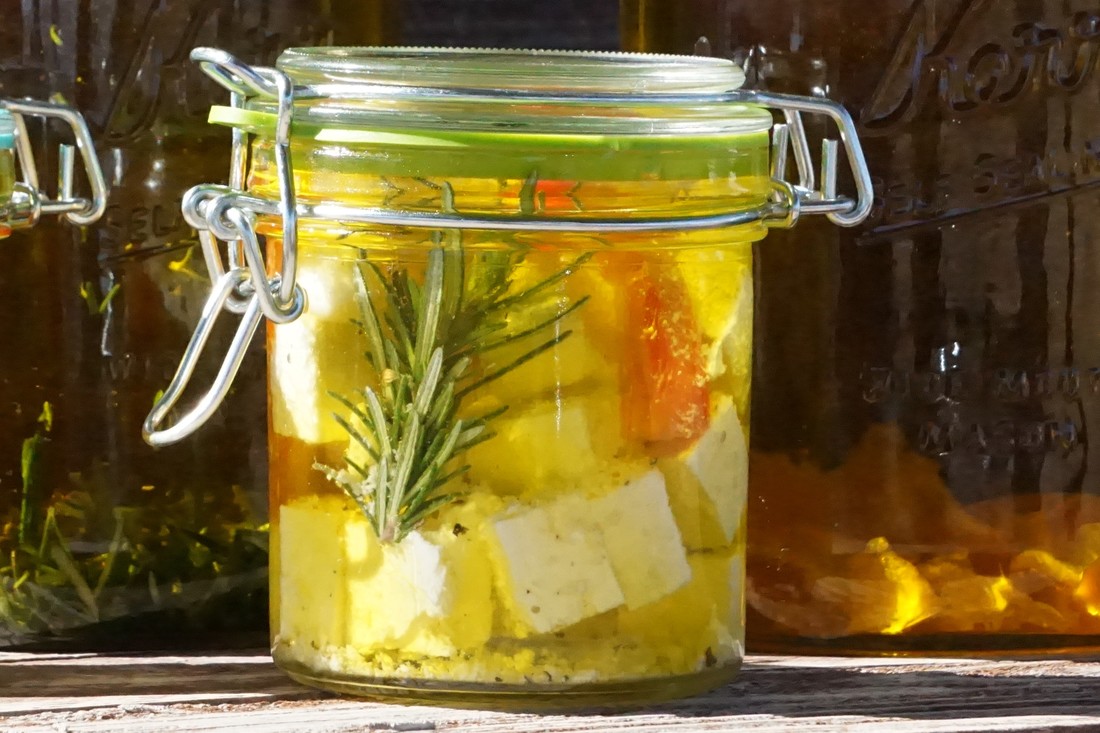 Ingredients 8 ozs of feta cheese cut into bite size cubes 2 to 3 1-inch sprigs of fresh rosemary or other herb(s) of your choice 2 to 3 slices of red pepper Whole pepper seeds Olive oil Instructions Place a sprig of your chosen herb on the bottom of a clean jar. Now fill the jar with cheese. Place 2 to 3 sprigs of your herb in the jar with the cheese. Now add the sliced red pepper. Drop a small pinch of pepper seeds in the jar. Pour in the olive oil until the cheese is completely covered and attach the jar lid. Place the jar in the refrigerator to marinate for at least 8 hours so all the flavors will infuse. The feta will keep for several weeks in the refrigerator. Though it is recommended to keep this in the refrigerator, my preference is not to ever put my jars in the refrigerator. However, I'm not really sure how long it will keep stored in the pantry as mine never lasts more than a few days. This makes a great hostess gift! Just remember to remove from the refrigerator in enough time for the oil to warm back to room temperature before presenting as a gift. Any oil and byproducts left in the jar when the cheese is gone can be used to make a salad dressing or added to soups and vegetables. Just started the infusion process for three batches of herbal cooking oils. The aroma of fresh chopped rosemary, sage and lemon balm brought in from the garden fills the air! Such an invigorating and woodsy smell! These oils will be bottled and ready for a farmer's market event I will be attending next weekend! More information on that event next week. This weekend I should make a few jars of herbal feta cheese. Delicious! That's a recipe I need to share with all of you guys in the future! 
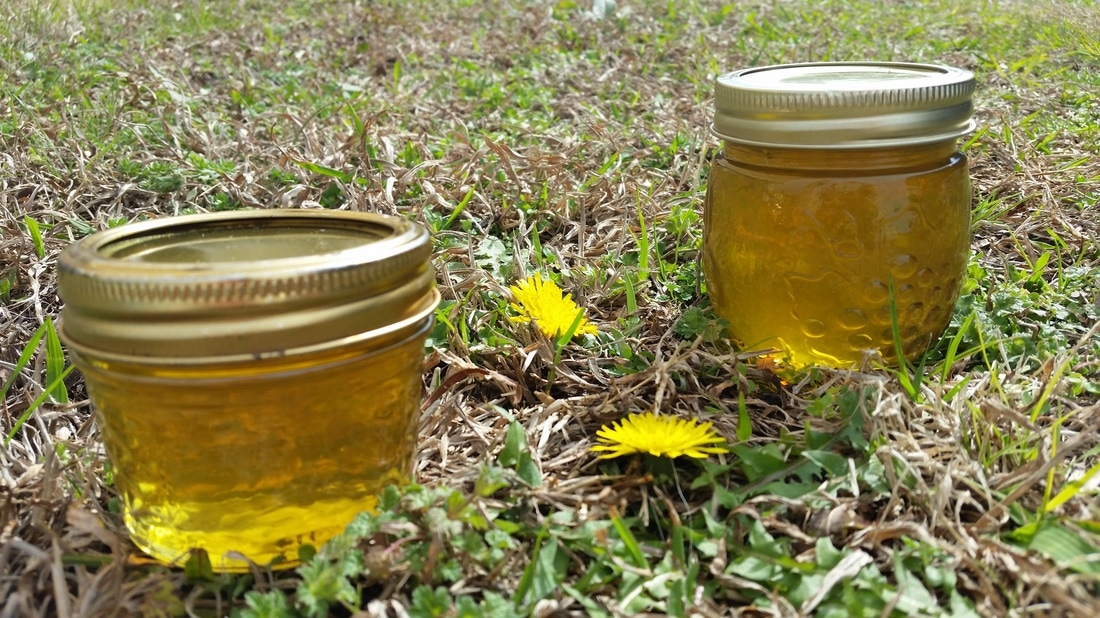 Couldn't resist the urge to try and capture the sun in a jar last week! While heading out to change the church billboard, it was necessary to walk through a beautiful patch of dandelions. After just seeing a recipe for dandelion jelly... I knew what must be done. So I found a shopping bag in my car and began picking!! Hope you all have been eating plenty of dandelion greens and drinking dandelion tea since our May 25th post last year. There are so many nutritional benefits! (For details, check it out in the Food & Recipes blog category.) I have now discovered a sweeter way to enjoy this herb. A couple of jars from my first batch of dandelion jelly are pictured above. This was a fun project for a sunny and warm Texas winter day! I'm going to share the recipe, along with some pointers, so you too can enjoy a jar of sunshine!
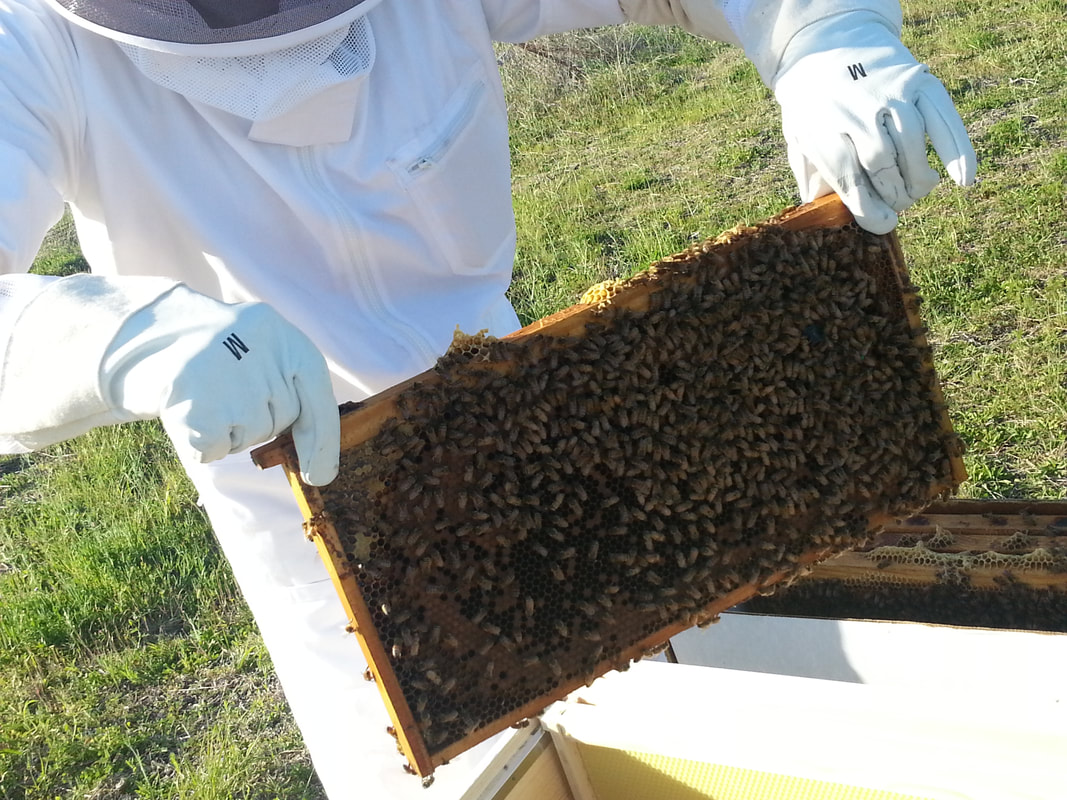
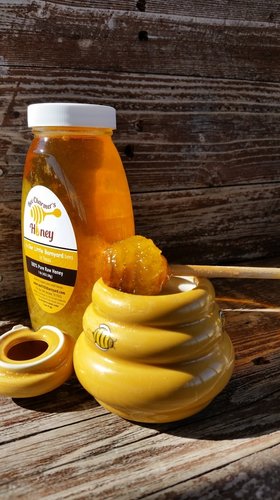 If your honey has crystallized, don't throw it out! It's not bad. Actually, crystallization is a sign of purity, meaning it is a high quality raw honey. "Why does honey crystallize?", you ask. Well, that's a bit of a science lesson. You see, honey is a super-saturated solution of glucose and fructose. It's the glucose that crystallizes. The amount of each type of sugar depends on the food collected by the bees. The higher the amount of glucose, the more crystallization there will be. So the types of sugar in honey depends on what the bees have been eating. Different types of plants have different levels of glucose. Scientist can actually determine what plants the bees have been gathering food from by analyzing the pollen in honey. Honey from plants like clover, maple, tupelo and blackberries have less glucose and therefore crystallizes slower. This same pollen is one of the things that makes honey so great! As many already know, eating local honey can help to reduce your allergies. This is because the pollen in the honey is coming from local plants that are triggering your allergies. A lot of large honey produces put the honey through processes which removes beneficial pollen. Removing the pollen also removes the ability to determine where the honey is from. Some carry it a bit further by blending different types of honey and sometimes using other additives. These processes greatly decrease the nutritional value at the cost of increasing profits, shelf life and making the color clearer and brighter. Crystallization happens faster when there are small particles of pollen to build on. So again, crystallization is a sign of purity in honey because fresh, raw honey has lots of pollen grains! Another factor which causes crystallization is temperature. Even in the hive, honey will crystallize when the temperature is around 50 degrees. So for those of you who enjoy eating honeycomb due to the crunchiness, it's the crunch of honey crystals you are enjoying. Those not so fond of honey crystallization should store their honey in a warm spot to slow down the process of crystallization. Is there anything one can do to remove the crystals? Yes. The best way is to heat the honey slowly by placing your honey container in a bowl of hot water. Microwaving is not recommended as it can heat unevenly or overheat. The best way is to heat only the small portion you currently need and not the entire jar. The down side to all this is, as the honey cools, it will once again crystallize. After trying a few different methods to liquify honey, only for it to crystallize again, I have decided to embrace it in its natural state. Finding peace in the fact that crystallized honey is a sign of its purity, rawness and wholesomeness. Believe it or not, the taste of honey has never been a taste that really excites me. Crystallized honey, on the other hand, is like eating a delicious candy to me! Could eat it by the spoonful! Other uses for crystallized honey is to add it to your tea, yogurt or oatmeal. It's perfect spread on a slice of bread or toasted bagel. Some use it as a spreadable glaze for cooking chicken or stir-fry. Bet it would be great on ham! What ever you do with it, don't waste this delicious food! I've used cast iron dutch ovens for years without knowing what all the pointy bumps were for on the inside of some lids. Well, as of today it's no longer a mystery. Turns out they are for basting. Having these bumps on the inside of the lid turns it into a self-basting oven. That's right, there's no need to open the oven, pull out the heavy pot, remove lid and bast the contents. Continuously basting while braising or stewing results in meats, soups and stews coming out very moist and juicy! Steam rises to the top of the pot, condensates on the lid and drips down the pointed bumps back into the soup or stew. It's like a little rain storm raining wholesome goodness on the delicious food inside.   This week I read a quote by author unknown... "If your yard gives you dandelions, make dandelion tea!" So I just had to try it. I have been reading for years that dandelions are edible, the entire plant including roots. There are also a lot of nutritional advantages to eating this herb. Yes, this "weed" is considered an herb. So what are the health benefits? - Rich in calcium, vitamin C, luteolin, potassium, fiber and antioxidants - Bone Health - Diabetic Health - Liver Health - Weight Loss - Facilitates Digestion - Stimulates appetite - Natural Laxative - Relieves Gas - Prevents Constipation - Lowers Blood Pressure - Reduce Blood Sugar Levels - Diuretic - Digestive Aid - Stimulates Insulin Production - Cancer Prevention - Skin Health The white milky substance in the roots is said to treat itchy skin, eczema and acne. Some even think it could treat fungal skin irritations like ringworm. So how have I used this herb this week? Well, let me break it down into the different parts of the herb. Flowers and buds: See the yellow flowers and buds in the photo above? Those became a part of my salad at lunch today. Not a bad taste at all. Blended in well with all the other vegetables in the salad. Leaves: This week I have enjoyed making tea with the young leaves. Love it! You can add honey or another sweetener of your choice. I prefer no sweetener. Just remove the young tender leaves from the stem, rinse in cool running water, and cut in smaller pieces. Place them in your tea cup and cover with boiling water. Let it stand for about five minutes, then drink. You can remove the leaves, or just leave them settled on the bottom as you enjoy your tea. I chopped some of the leaves in the picture above and added to the salad I enjoyed for lunch and in a cup of hot tea after my meal. Roots: The roots are said to be really good for you. They can be chopped and dried for use in making tea. Earlier this week I chopped some in the food processor and dried them. I later made a hot tea. I will say, it did not have much of a taste. Might be better adding it to another blend of hot tea. Shouldn't affect the taste and you will still be getting all the nutritional benefits. Definitely prefer tea made from the leaves. Hope this inspires you to use those dandelions in your yard instead of mowing them down. Think herb and not weed. Disclaimer: The benefits stated above have NOT been verified by myself. Always check with your doctor before taking herbs, as some are harmful if you are pregnant or taking certain medications! 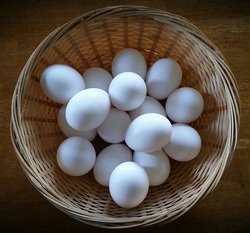 Did you know that most other countries sell eggs that are not refrigerated? The US is one of the few oddballs when it comes to refrigerating eggs. Let me tell you about my personal experience and share some egg facts with you. Then you can decide what you are more comfortable with. Many years ago, while at a relative’s house, I noticed a large flats of eggs stored in the utility room. I wondered why they were not refrigerated. Sometime later while watching a cooking show, a famous chef stated that he preferred to cook with room temperature eggs. These two events got me to thinking. I did some research and discovered not everyone stores their eggs in a refrigerator. Before I go any further, let me give you some scientific information. Just before a hen lays an egg, she adds a protective covering to seal the egg. This is an antibacterial covering called bloom. The bloom prevents bacteria from entering the egg as well as keeping moisture inside the egg. Mother Nature is awesome! Here is something else you might not know. Commercial egg producers wash off the bloom before packing the eggs for sale to the public. Washing the bloom off the egg, particularly with cold water, causes the pores of the egg shell to pull in bacteria from the outer surface of the egg. When this is done, eggs must be immediately refrigerated to prevent bacteria, which may have entered, from growing and causing a food-borne illness that could lead to food poisoning. Knowing this, you should never remove eggs from the refrigerator and then store them at room temperature. The protective bloom is no longer on the egg. Therefore, the egg is NOT protected from bacteria entering and growing inside. So how do I store eggs if I do not refrigerate them? I store them at room temperature in a cool part of the kitchen. Here are some pointers... 1. Use only farm fresh eggs that you know have never been washed. 2. Do NOT wash the eggs. Most eggs are very clean when laid. If they are a little dusty or a feather attached, wipe them off with a dry cloth or paper towel. If they are dirty, wash them in water and store in the refrigerator. 3. With a pencil, write the date the egg was laid on the shell. When you get a large collection of eggs, this will make it easier to identify the oldest ones. The accountant in me always uses the FIFO (First In First Out) method when choosing a fresh egg for cooking. 4. At this point you can either place the eggs in a basket as pictured here, or place them fat end up in an egg carton. (In order of date laid, of course. wink) 5. Now comes the big question... How long can an egg be stored at room temperature? This question is almost as controversial as, "Which came first, the chicken or the egg?" All I can tell you is what I, and others I know, have done. I have eaten and used eggs that were stored on the counter for a couple of months. HOWEVER, I NEVER use them when they are more than a few of weeks old without doing the Float Test. See my blog from last week as it tells in detail how to do the Float Test. Just remember, if the egg floats, don't eat it. 6. When using eggs stored at room temperature, always make a few quick common sense checks first. 1) Float Test - make sure the egg sinks before using it. 2) If it smells bad, never use it! 3) A fresh egg whites are a cloudy white. Old eggs have clear egg whites. Spoiled eggs whites have a pinkish cloudy color. Do NOT use. I have followed these steps for years without any signs of contracting food poisoning. I hope you have found this information informative and useful. Now for the disclaimer.... The FDA recommends refrigerating eggs. Follow this link, http://www.fda.gov/food/resourcesforyou/Consumers/ucm077342.htm for more information. Please do your research on egg storage and follow the method you are most comfortable with. Cheers, and God Bless! 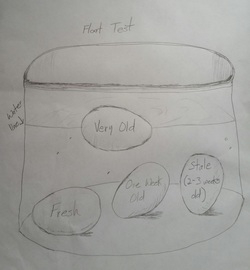 People are always asking me how the float test works in determining the freshness of an egg. To show how it works, I drew this simple diagram. Eggs that lay flat on the bottom are fresh. If the fat end is starting to stand up they are about a week old, and a few weeks old if they are standing on end. When doing this test, it is very possible you will see eggs floating somewhere between the standing on end and the floating above water stage. This just means the air-cell size is getting bigger in the egg. The bigger the air cell, the higher it will float, the older the egg will be. Another way to estimate the egg's age is to break it open and examine the contents. A fresh egg has a firm yolk standing high surrounded by an egg white with a cloudy firm appearance. As the egg ages, the egg white, or albumen, will becomes clear and watery and the yoke begins to flatten. The older the egg gets, the more likely it is the yolk will break when you crack open the shell. This happens because water moves from the albumen (egg white) to the yolk causing the yolk membrane to stretch and weaken. It eventually breaks. If you want still another way to test freshness, smell it! If it has a foul rotten-egg smell, it's bad! This smell results from the emission of hydrogen sulfide. |

A Mattingly
Artist, Writer, Holistic Living Guide Important Disclaimer: Any content discussing medicinal uses of plants, herbs, or food as medicine is informational only and not prescriptive. When dealing with health issues, be sure to do your own research and consult with the appropriate health professional for guidance. These statements have not been evaluated by the FDA. It is information based on my personal research and studies.
Categories
All
Archives
September 2023
|


 RSS Feed