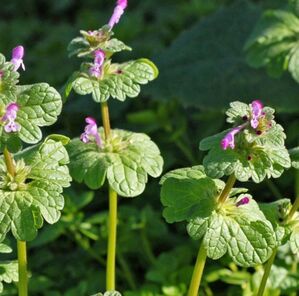
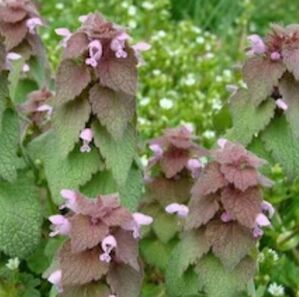
Henbit and dead nettle are not the same plant. However, they are both edible and medicinal. All parts of both plants that grow above the dirt can be eaten raw or cooked, making them both great options to add to soups or salads. With groceries being super expensive these days, anything that can be used to bulk up a dish for free is wonderful. Especially if it's growing in you yard or along the sidewalk near your home. Just head out the door and pick what's needed when you need it. In addition to being free groceries, both are nutritious and high in iron, vitamins, and fiber. In all the excitement of free and healthy groceries, don't forget the medicinal benefits.
Henbit has been used for hundreds of years to treat fevers and body aches. Pour boiling water in a cup over a few tablespoons, or small handful, of the henbit stems, leaves, and flowers. Cover and let steep for 15 minutes. Dead nettle can be chewed up and them put on the affected area of a bug bite or sting as it has anti-inflammatory and antihistamine properties. Some even use it as a tincture or tea to treat allergies. These herbal plants are another fine example of plants one can grow in their backyard farmacy as nutritional and medicinal plants. But they're only around in the spring. If you want to use them year round, they can be easily dried and saved for later. I like to put them in my dehydrator at 110 degrees F for about 6 hours.
0 Comments
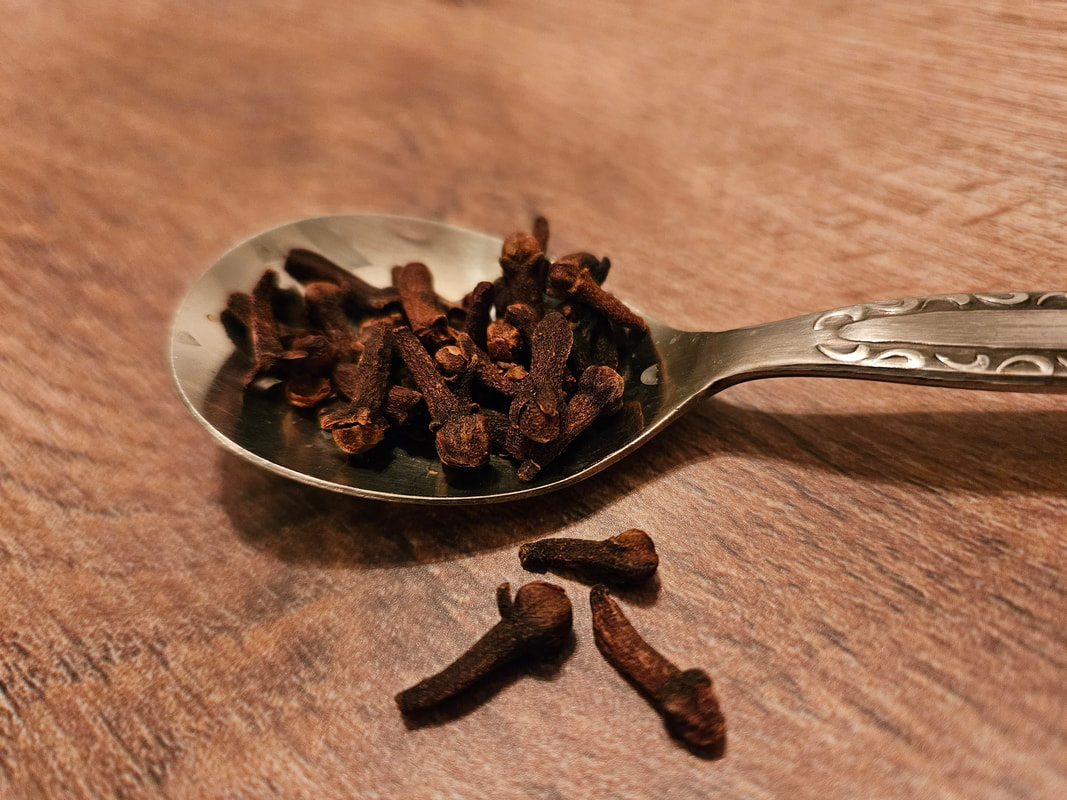 Not many of us here in the United States have a Sysygium aromaticum tree growing in our backyard. However, we eat and cook with its unopened, dried flower buds quite often. Especially this time of year as an ingredient in the signature flavor of fall, pumpkin pie spice, that’s in everything! Those buds we know as cloves. These tropical evergreen trees are native to the Malaku Islands in Indonesia. Cloves, whole or ground, are also used to flavor meats, curries, chai, mulled wine, and cider.
Along with pumpkin pie spice, ragweed is another sign of fall approaching. For many this means allergies and sinus congestion. Congestion can cause toothaches for some people. No worries, pull out the cloves! As with a lot of the foods and spices we have in our pantry, cloves have several medicinal uses. Clove oil is even used in dentistry to treat pain. It contains the chemical eugenol, an anesthetic and antibacterial agent, which helps to numb and reduce the pain of a toothache. Here are a few simple methods. One is to put a few cloves in your mouth and moisten them with your saliva. To release more of its power, crush it with your non-painful molars before holding it against the aching tooth for about thirty minutes. Spit out and repeat the process once more if needed. Your tongue will definitely become numb if used to move the cloves around in your mouth. You can use ground cloves as well by adding some to ¼ teaspoon of olive oil to make a paste. Then apply with a cotton swab or your clean finger. A cup of clove tea is another alternative. If you have several weeks, you can crush and soak cloves in olive oil to make a clove oil you can easily apply with a cotton swab when needed. Remember to strain out the clove pieces before storing. There are some possible side effects to using clove oil. If applied directly in your mouth or on your skin, it’s possible one could experience skin or gum irritations, damage, or a burning sensation. The presence of eugenol can be harmful for people suffering from blood disorders. It is NOT for INFANTS or YOUNG CHILDREN. Clove oil should not be ingested as high amounts can lead to seizures and liver injury. As always, do your own research and consult a physician if you have questions or concerns about using this or any other treatments. This is intended to be informational only and not medical advice. 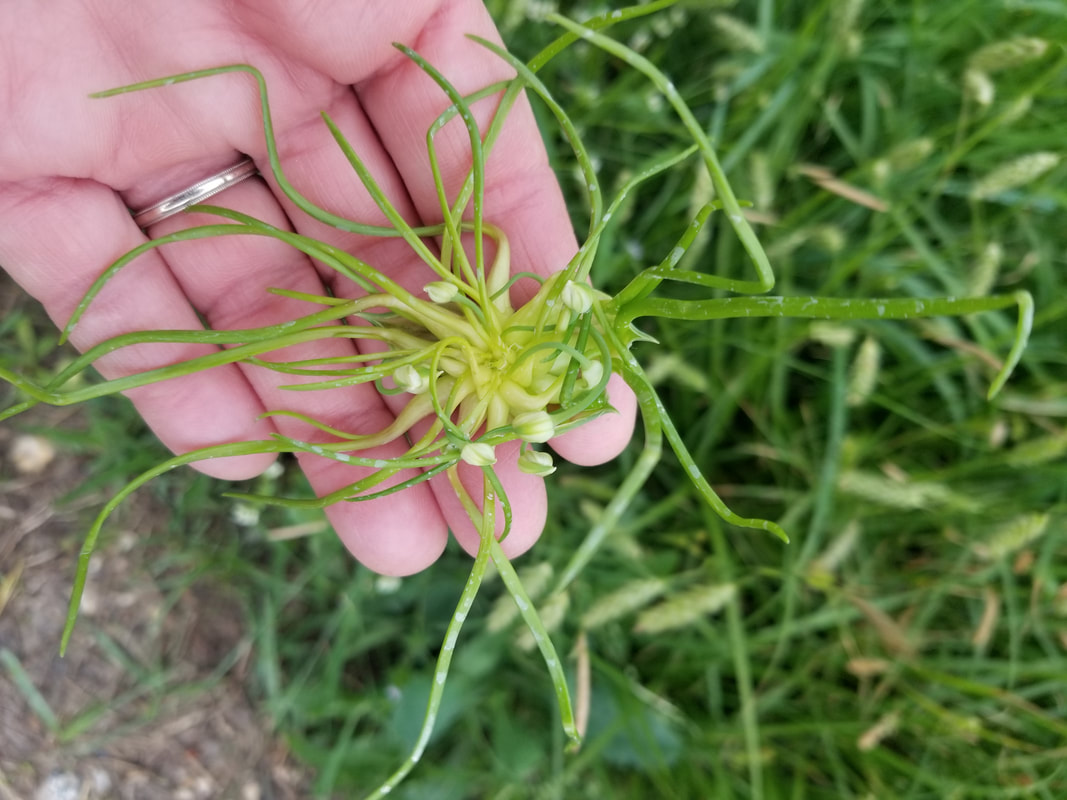 Coronavirus got you sheltering in place? Then there is all the rain on top of that which may have you trapped inside, preventing you from getting you garden planted. No worries because there are lots of wild edibles growing in the spring. Many of which are as nutritious, or even more so, than what's growing in your gardens. We have a ditch full of one such wild edible. More on that in a second. For a few of reasons, our yard is WILD during the spring. First, we let it go wild intentionally as all the spring flowers and 'weeds' are a great nectar and pollen source for our honey bees. It also makes for great tasting honey according to our repeat customers. The second reason is something we don't have much control over. The rain. We couldn't mow if we wanted to for all the standing water. Specially the ditch! For an added bonus, many of the weeds growing in our country yard are edible for us as well.
This might be one of those 'weeds' you transfer to a safe growing area in your yard before mowing them all down. Who knows, there may be a run on onions in the grocery store some day. These days, you never know. 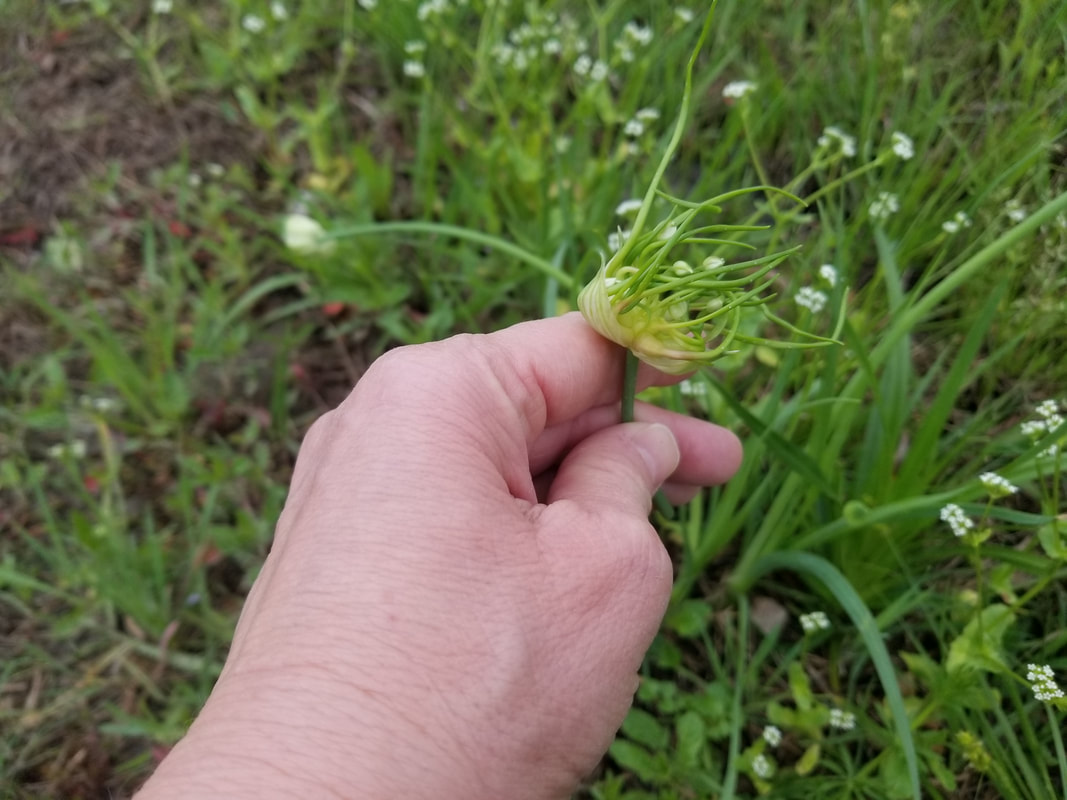
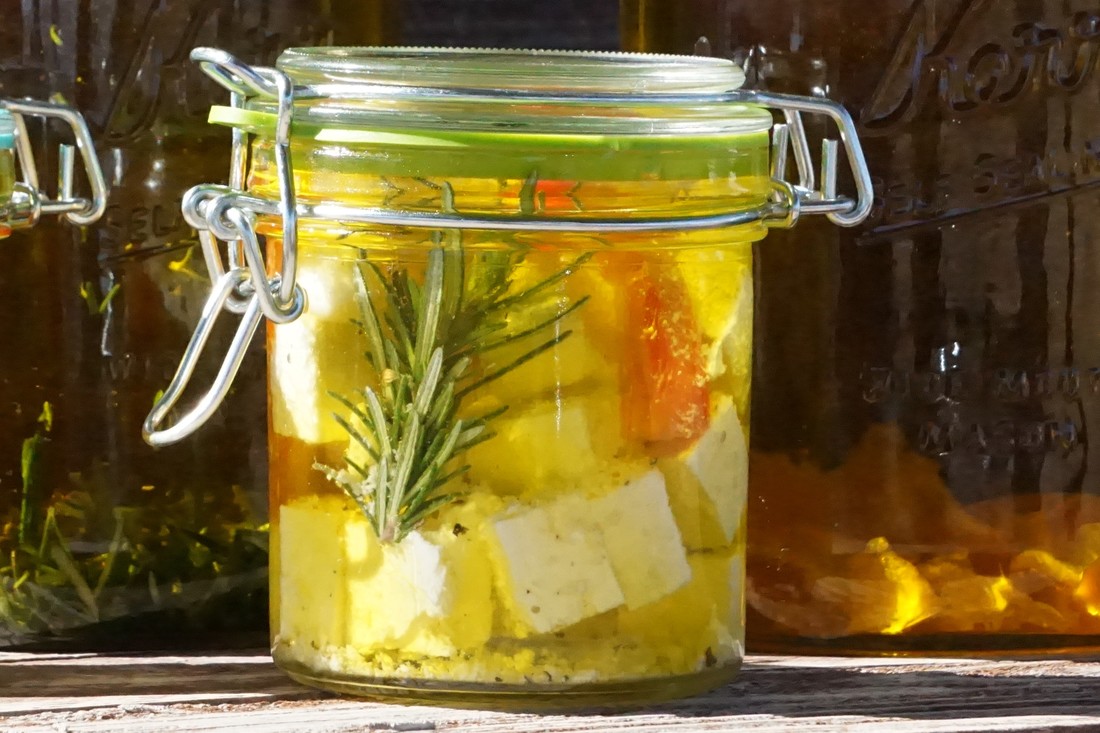 Ingredients 8 ozs of feta cheese cut into bite size cubes 2 to 3 1-inch sprigs of fresh rosemary or other herb(s) of your choice 2 to 3 slices of red pepper Whole pepper seeds Olive oil Instructions Place a sprig of your chosen herb on the bottom of a clean jar. Now fill the jar with cheese. Place 2 to 3 sprigs of your herb in the jar with the cheese. Now add the sliced red pepper. Drop a small pinch of pepper seeds in the jar. Pour in the olive oil until the cheese is completely covered and attach the jar lid. Place the jar in the refrigerator to marinate for at least 8 hours so all the flavors will infuse. The feta will keep for several weeks in the refrigerator. Though it is recommended to keep this in the refrigerator, my preference is not to ever put my jars in the refrigerator. However, I'm not really sure how long it will keep stored in the pantry as mine never lasts more than a few days. This makes a great hostess gift! Just remember to remove from the refrigerator in enough time for the oil to warm back to room temperature before presenting as a gift. Any oil and byproducts left in the jar when the cheese is gone can be used to make a salad dressing or added to soups and vegetables. Just started the infusion process for three batches of herbal cooking oils. The aroma of fresh chopped rosemary, sage and lemon balm brought in from the garden fills the air! Such an invigorating and woodsy smell! These oils will be bottled and ready for a farmer's market event I will be attending next weekend! More information on that event next week. This weekend I should make a few jars of herbal feta cheese. Delicious! That's a recipe I need to share with all of you guys in the future! 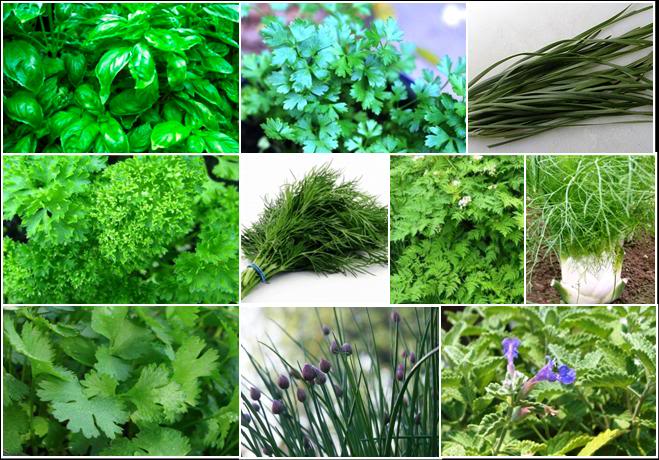
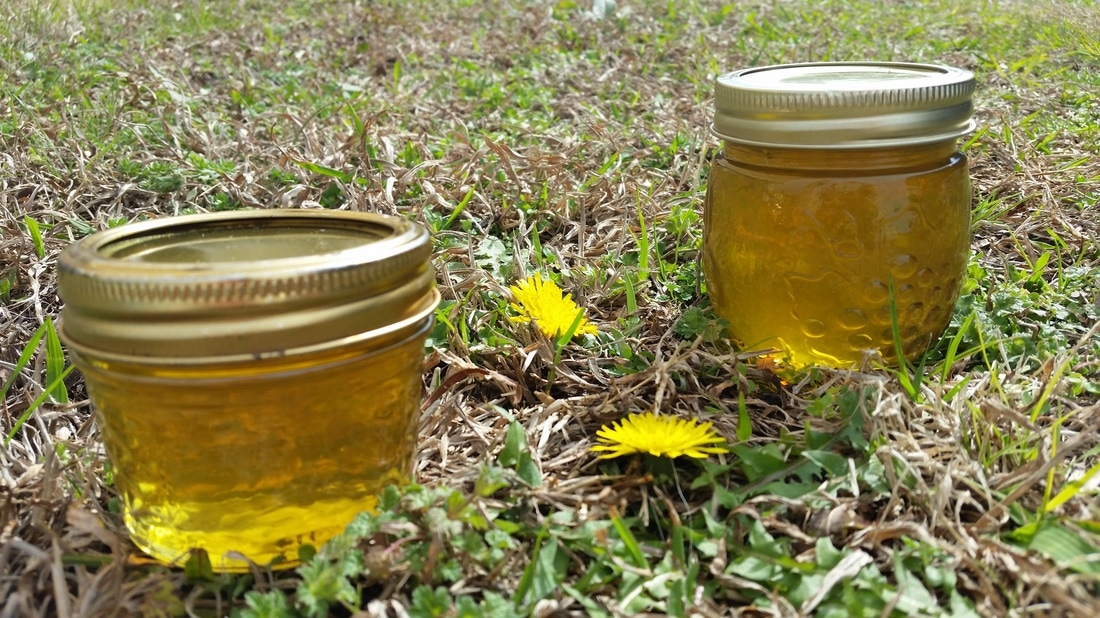 Couldn't resist the urge to try and capture the sun in a jar last week! While heading out to change the church billboard, it was necessary to walk through a beautiful patch of dandelions. After just seeing a recipe for dandelion jelly... I knew what must be done. So I found a shopping bag in my car and began picking!! Hope you all have been eating plenty of dandelion greens and drinking dandelion tea since our May 25th post last year. There are so many nutritional benefits! (For details, check it out in the Food & Recipes blog category.) I have now discovered a sweeter way to enjoy this herb. A couple of jars from my first batch of dandelion jelly are pictured above. This was a fun project for a sunny and warm Texas winter day! I'm going to share the recipe, along with some pointers, so you too can enjoy a jar of sunshine!
|

A Mattingly
Artist, Writer, Holistic Living Guide Important Disclaimer: Any content discussing medicinal uses of plants, herbs, or food as medicine is informational only and not prescriptive. When dealing with health issues, be sure to do your own research and consult with the appropriate health professional for guidance. These statements have not been evaluated by the FDA. It is information based on my personal research and studies.
Categories
All
Archives
September 2023
|


 RSS Feed